Data transforms in Apache Camel with BeanIO

Apache Camel has so many ways of making your life easier; here’s one.

I needed to import a fixed-format file, the kind of thing that reminds you to hug XML and even give JSON a break every so often. In this case, I was importing the Yale “Bright Star Catalogue“, featuring a load of numbers about all the visible stars, about 9000 all told. Not a huge database, but a pain to parse, like all fixed format data, and I needed output in XML.

I looked at what Camel had to offer and came across the BeanIO component, which handles CSV, Fixed and XML formats. Now this immediately made life easier, for a start there’s an external XML mapping file to tell the parser what fields to expect and what to do  (for all the options, see here). Here’s the first few fields in my star data :

<?xml version="1.0" encoding="UTF-8"?>
<beanio xmlns="http://www.beanio.org/2012/03" xmlns:xsi="http://www.w3.org/2001/XMLSchema-instance"
xsi:schemaLocation="http://www.beanio.org/2012/03 
http://www.beanio.org/2012/03/mapping.xsd">

<stream name="stars" format="fixedlength">
     <record name="star" class="java.util.HashMap">
         <field name="HR" length="4" trim="true" />
         <field name="NAME" length="10" trim="true" />
         <field name="DM" length="11" trim="true" />
         <field name="HD" length="6" trim="true" />
     </record> 
 </stream>

I’m using vanilla Spring XML in my Camel, so I’ve no class to map my data to, hence I’m using HashMap, but if you’ve got one, your class goes in the record. Also, as I’m hoping for XML output, I’m trimming each field so I don’t get a file full of spaces.

BeanIO can run as either a DataFormat, or as a Component, I’m using the former. Now al I needed was a folder to put the file in and a bit of Camel:

<dataFormats>
 <beanio id="stars" mapping="mapping.xml" streamName="stars" 
ignoreUnexpectedRecords="true"/>
</dataFormats>
<route>
 <from uri="file:inbox?noop=true"/>
 <split streaming="true" parallelProcessing="true">
 <tokenize token="\r\n|\n" xml="false" trim="true" />
 <to uri="direct:stars"/>
 </split>
 </route>
<route>
 <from uri="direct:stars"/>
 <unmarshal ref="stars"/>
</route>

This is standard stuff, the dataFormat section points to the mapping file and tells it what stream definition I want from it, then I split the file, send each line on and “unmarshal” it into a HashMap using that definition.

Now at this point I was fairly happy, the split was simple, but I was still faced with having to create some sort of Groovy bean to assemble the HashMap into the XML I wanted. I actually started down that road and then came across the following in the docs:

Our original mapping file from Section 2.1 can now be updated to parse XML instead of CSV with only two minor changes. First, the stream format is changed to xml. And second, the hire date field format is removed…

Lightbulb moment. All I needed was to add a second steam format using the fields I wanted in my XML, and BeanIO would “marshall” it for me. No bean, no mess no fuss. Again there’s a load of options, you can rename elements, make some things attributes, change format. I just needed the plain version with a couple of tweaks to suppress the <?xml… header and format the output just for readability’s sake:

<stream name="stars2" format="xml" xmlType="none">
 <parser>
    <property name="suppressHeader" value="true" />
    <property name="indentation" value="2" />
</parser>
 <record name="star" class="java.util.HashMap">
    <field name="HR" />
    <field name="NAME" />
    <field name="DM" />
    <field name="HD" />
</record>
</stream>

Now I just need to add in the DataFormat and mod my route a little so my filename comes from the data:

<dataFormats>
  <beanio id="stars" mapping="mapping.xml" streamName="stars" 
  ignoreUnexpectedRecords="true"/>
  <beanio id="stars2" mapping="mapping.xml" streamName="stars2"/>
 </dataFormats>
 
 <route>
 <from uri="file:inbox?noop=true"/>
 <split streaming="true" parallelProcessing="true">
 <tokenize token="\r\n|\n" xml="false" trim="true" />
 <to uri="direct:stars"/>
 </split> 
 </route>
 
 <route>
 <from uri="direct:stars"/>
 <unmarshal ref="stars"/>
 <setHeader headerName="CamelFileName">
     <simple>${body[0].get('HD')}.xml</simple>
 </setHeader>
 <marshal ref="stars2"/>
 <to uri="file:filebox"/> 
 </route>

That’s it, 9000 XML files in a few lines of configuration:

<star>
<HR>3</HR>
<NAME>33 Psc</NAME>
<DM>BD-06 6357</DM>
<HD>28</HD>
</star>

Now the neat thing about this, is that the is file is one of dozens of astronomy data files – many in fixed format. So the same code, add a new stream to the mapping file and you’re parsing out the “ACT Reference Catalog ” of 100,000 stars.


CheerLights by Camel

Cheerlights

It’s that time of year again, when, up and down the country, people are sticking together electronics and lights for the CheerLights project. If you don’t know of it, then it a wheeze from  ioBridge Labs to connect us at this festive season. Essentially, if you tweet one or more of a set of colours using the #cheerlights tag, their server will pick it up and publish it to a ThingSpeak channel. Once there, a simple API makes it possible to construct something that sets your lights to the current colour. It’s a simple idea, but very powerful when you think of the thousands of lights and gadgets, all changing colour simultaneously across the world in response to a tweet.

UntitledLast year, I went virtual with a bit of Processing, but this year, I’m looking to do a light based on a Ciseco RFµ328 board. It’s basically a tiny Arduino, but with an SRF radio. So, it’s CheerLights API -> Raspberry Pi (SRF Dongle) ->  RFµ328 + RGB LED. What could be simpler?

Well, it started out ok. I did a Tcl script that polled the ThingSpeak API and got the current colour every 10 seconds, spat that out to the RFµ and wrote a little bit of code on that to set the RGB LED. The problem then is that you have to wait 10s for it to notice changes, by which time it might have missed some tweets if it’s busy; or, you are constantly sending ‘red’ over SRF when it’s quiet. Plus, some clever folk send out things like “#cheerlights red blue green red” and of course, you’ll just get the last one. That’s the problem with REST, it’s a polling technology.

Now, they’ve a longer feed which gives you a bit of a history, but you’re going to have to parse it and work out where in the list your light is, plus store some sort of status between polls etc. It’s getting more complex, and with a fixed poll interval still not ideal as the other end, the twitter end, is an unknown. You might of course be thinking “Get a life, it’s a light” and you’d be right in some ways. However, as an engineer, it’s an interesting problem and to be honest, you never know when you might want to use Twitter to control/inform some other process when you’ve little control over the tweeters.

Let’s start by bringing the problem under our control, by looking at Twitter ourselves. Now the steps are:

  • Tell the Twitter API what we’re searching for, i.e. the #cheerlight hashtag. It’s an Event api, so we’ll get results only as they’re tweeted. That neatly fixes the polling issue, whilst still getting us tweets as they happen.
  • Pull any colours out of the tweet – bit of regex here perhaps.
  • Send those colours out to the widget. That doesn’t change

Ok, it’s a bit more complex, especially the Twitter side, but we’ve got a Camel on standby, so lets ride!

Using Camel Routes

Now Apache Camel has a Twitter component and a very nice example of it’s use, so I won’t go into the process of creating Twitter keys. Suffice to say, they’re in a properties file and I can use them in a route to get the tweets.

Our starting route is therefore:

<route id="twitter-feed">
  <from uri="twitter://streaming/filter?type=event&amp;keywords=#cheerlights&amp;consumerKey={{twitter.consumerKey}}&amp;consumerSecret={{twitter.consumerSecret}}&amp;accessToken={{twitter.accessToken}}&amp;accessTokenSecret={{twitter.accessTokenSecret}}" />
<!-- Body is Twitter4J Status Object -->
  <log message="${body.user.screenName} tweeted: ${body.text}" />
<!-- Queue them up -->
  <to uri="seda:statusFeed"/>
</route>

One of the things to like about Camel is the ability to build up a problem in pieces; it’s ‘loosely coupled’, which is good. This route watches for #cheerlights and returns the tweet – it does just one job. Notice the body isn’t a string, but a tweet object with full data like author, georef, replies etc etc.  Here I’ve dropped the results in a queue, but I could have started with a file, or simply printed it out. And, once the route works, I can go on to the next part in confidence.

Next step is get any colours. Time for a bit of Groovy here.

<route id="colours">
  <from uri="seda:statusFeed"/>
<!-- Find the colours and create delimited string as new body. Groovy rocks for this! -->
  <setBody>
    <groovy>request.getBody().getText().toLowerCase().findAll(/(purple|cyan|red|
      green|blue|white|warmwhite|yellow|orange|magenta|pink|oldlace)/).join(',')
    </groovy>
  </setBody>
  <log message="colours ${body}" />
<!-- Drop each colour into the colour queue -->
  <split>
    <tokenize token=","/>
    <to uri="seda:colourFeed"/>
  </split>
</route>

Here I replace the body of the message with a delimited string of any colours in it e.g. the tweet “#cheerlights set everything to blue. Now some red and green” becomes “blue,red,green” via a bit of Groovy regex-less magic. Since I might get one colour or ten in a given tweet next I use the Splitter to drop each colour as a separate message into a new queue to be consumed by the widget driver. Note because of the queues, each route doesn’t know anything or depend the others apart from there needing to be consumers. This is pretty handy as I can for instance feed the colours from a file, rather than test-tweeting. And, because the original full-fat tweet is preserved in the initial queue, I can pick out other facts, process them and reuse the information if I wanted to: there could be a database of tweet lat/lon pairs, or an analysis of tweeters or a mashup of colours picked. All just by altering the routes slightly to tap into the information flow at the right point.

The last bit of the puzzle is outputting the right data over SRF. Now the folks at Ciseco, have made it pretty easy. You send serial data to the USB dongle on the Pi, and it turns up on the RFµ328. But, they also have a neat protocol called LLAP that’s ideal for this sort of stuff and handles a lot of the housekeeping for you  . It uses 12-character messages, which is fine for us if we send an RGB string. So, I’ll create a new message type called PWM and send it an RGB colour to my RFµ which has the address “AC”. All LLAP messages start with an ‘a’, so the message for blue would be:

aACPWM0000FF

All the final route needs to do is read a colour, turn it  into RGB via a smidgen more of Groovy and then send it via the Stream component to the USB port the dongle is on.

 <route id="changer">
   <from uri="seda:colourFeed"/>
     <!-- throttle 1 messages per sec -->
     <throttle>
       <constant>1</constant>
       <log message="switching light to ${body}"/>
       <transform>
         <groovy> def cmap = [red:"FF0000",green:"008000",blue:"0000FF",cyan:"00FFFF",white:"#FFFFFF",warmwhite:"FDF5E6",purple:"800080",magenta:"FF00FF",yellow:"FFFF00",orange:"FFA500",pink:"FFC0CB"]
 "aACPWM" + cmap.get(request.getBody())
         </groovy>
       </transform>
       <log message="Sending LLAP Msg ${body}" />
       <to uri="stream:file?fileName=/dev/tty.usbmodem000001"/>
     </throttle>
 </route>

Notice I’ve wrapped the route in a call to the Throttler component so that the colour doesn’t change more than once a second. This makes sure that tweets of “red green blue” don’t end up as just a flicker and then blue. The input route could be throttled in a similar way so only so many colours were in the queue in case there was a flurry. See RoutePolicy for details..

Wrap up.

20141221_210057
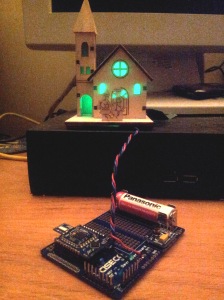
I’ve left the Arduino/ RFµ328 side out of this post – it’s easy enough to get something like this with a few lines of code and a bit of soldering:

All the Groovy is inline in this example. It’s not the most efficient method, really it should be a Bean so things like the array are only initialised once.

The point is more that Camel is a fantastic environment for the IoT’er 🙂